OPEN-SOURCE SCRIPT
Merged: S&R Power + RSI Div Zones + Strategy
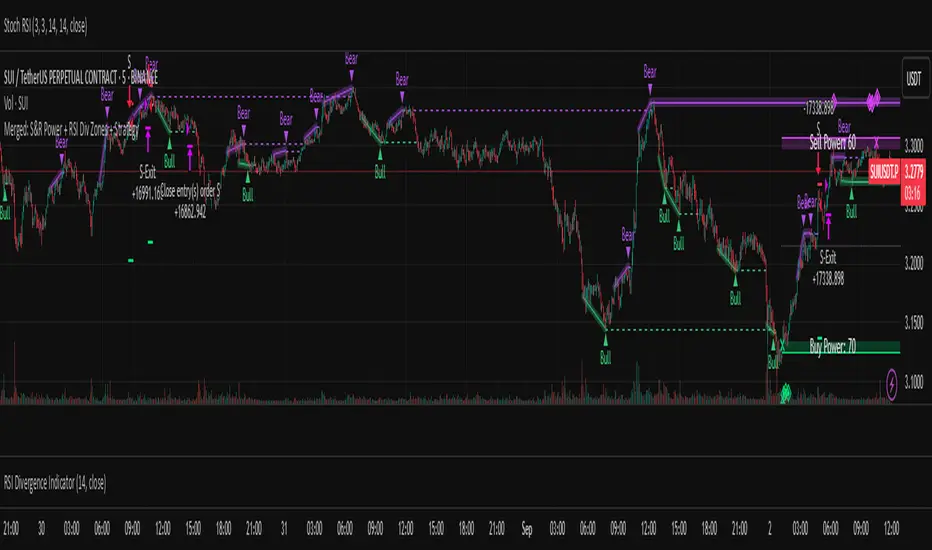
S&R Power + RSI Divergence Zones (ChartPrime) into a single, rules-based TradingView strategy. The goal: take a visually appealing idea and make it testable, configurable, and automatable — with explicit entries, filters, and exits.
Concept
• Module 1: S&R Power (zones + Buy/Sell Power, channel height).
• Module 2: RSI Momentum Divergence Zones (bull/bear divergence levels).
• Entry logic uses the latest divergence “zone” as the actionable price level, while Module 1 provides context/filters (power thresholds, channel height, optional confirmation).
Entries
• Long: when price tags the most recent bullish divergence level.
• Short: when price tags the most recent bearish divergence level.
• Optional “wait window” (in bars): if filters aren’t met immediately, the strategy can keep listening for a qualified entry for a limited time after the initial signal.
Filters (toggleable, per side)
• Touching Buy/Sell Power zones from Module 1.
• Optional “confirmation diamond” emulation from Module 1.
• Minimum Buy Power (for longs) / Minimum Sell Power (for shorts).
• Minimum channel height (%) to avoid trading inside very narrow ranges.
• Power difference threshold: (Buy − Sell) for longs, (Sell − Buy) for shorts.
Exits & Risk
• Separate TP/SL for longs and shorts (percent-based).
• Reaction to opposite signal while in position: None, Close, or Reverse (configurable per side).
• No pyramiding (pyramiding=0). Guide lines plot entry/TP/SL for clarity.
Repainting & Confirmation Notes
• Visual elements from Module 1 can repaint historically. This strategy avoids relying on repaint-prone shapes by (a) triggering on confirmed divergence levels from Module 2, and (b) gating entries with filters and a wait window.
• Divergence detection uses pivots and lookbacks; a divergence is considered only once it satisfies the lookback conditions (barstate.isconfirmed in the signal logic).
Inputs Overview
• Strategy Settings: TP/SL for long/short, guide line length, max guides, behavior on opposite signal (None/Close/Reverse).
• Filters & Waiting: wait bars after signal, power zone checks, confirmation option, power thresholds, channel height %, power difference thresholds.
• Indicator 1 — S&R Power: length, extend, colors.
• Indicator 2 — RSI Divergence Zones: RSI length, show divergence zones, number of stored zones, bull/bear colors.
How to Use
Add to chart on your desired symbol/timeframe.
Tune “Filters & Waiting” to your market conditions (e.g., increase channel height % to skip flat).
Set Buy/Sell Power thresholds and power difference to control selectivity.
Choose how the strategy reacts to opposite signals (None/Close/Reverse).
Adjust TP/SL per side, and set commission/slippage in Strategy Properties to match your venue.
Good Practice
• Forward-test in live conditions; do not rely solely on backtests.
• Commission/slippage matter; set realistic values in properties.
• Different assets/timeframes may need different thresholds for power and channel height.
Credits & Disclaimer
• Built on ideas from two ChartPrime indicators (S&R Power and RSI Momentum Divergence Zones). Not affiliated with ChartPrime.
• For educational purposes only. This is not financial advice. Trade responsibly with proper risk management.
نص برمجي مفتوح المصدر
بروح TradingView الحقيقية، قام مبتكر هذا النص البرمجي بجعله مفتوح المصدر، بحيث يمكن للمتداولين مراجعة وظائفه والتحقق منها. شكرا للمؤلف! بينما يمكنك استخدامه مجانًا، تذكر أن إعادة نشر الكود يخضع لقواعد الموقع الخاصة بنا.
إخلاء المسؤولية
لا يُقصد بالمعلومات والمنشورات أن تكون، أو تشكل، أي نصيحة مالية أو استثمارية أو تجارية أو أنواع أخرى من النصائح أو التوصيات المقدمة أو المعتمدة من TradingView. اقرأ المزيد في شروط الاستخدام.